Tips, tricks, and tutorials for taking your WordPress site to the next level.

Ultimate WordPress Hacking Recovery Guide

First, a confession: I have had my WordPress sites, and my clients’ WordPress sites, hacked a few times. Most hackers do very little damage, and you can clean and secure your site with a little bit of know-how.

We’ll divide this lengthy guide into several sections:

  • Diagnosing if You Have Been Hacked
  • Cleaning Your WordPress Site
  • Securing Your WordPress site against reinfection or future hacks

What You’ll Need to Clean Your WordPress Site

Diagnosis: How You Know Your WordPress Site Has Been Hacked, the Obvious Clues

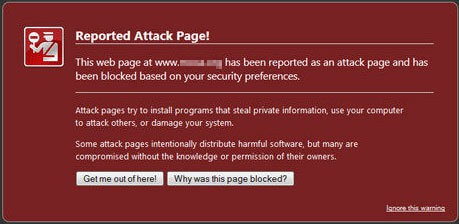
In nearly all cases, you’ll know quite clearly that your site has been hacked. The most obvious clue will be when Google throws up a warning page like this one:
maroonscreen

Or your meticulously edited could be replaced by a political message:
hacked-saudi-blog

Or, your site might be hijacked to display a cute ninja turtle (yes, it happened):
hackerturtle

The hacks shown in the screenshots above are not serious. These are honorable (sort of) hackers who hack for sport and street cred–they rarely do any damage, and they rarely intend to re-infect your site (although below we’ll discuss mandatory measures you’ll need to take to secure your site headed forward).

Diagnosis: When the Hacking Is Less Obvious and More Malicious

If your site has been taken over by a black hat SEO, the clues may be less obvious, and the danger to your website more serious. If you’re lucky, they’ll fill your site up with keyword gibberish in Turkish:
hacked-front-page-screenshot
If you’re not lucky, you may go for weeks or even months before finding the hidden Cialis and Viagra links in your source code.

Another favorite goal of more sophisticated hackers will be to employ your website as a mail server; hackers can then send spam emails. The danger to you here is that your IP address can be blacklisted and you’ll have trouble sending legitimate mail in the future.

From time to time you should open your homepage and press Ctr-A, which may help you spot those sorts of freeloading links. Even though those links might not harm the user experience, they can significantly impact your rankings and might even get you removed from the index.

Diagnosis: Tools for Determining if You’ve Been Hacked

  • Google’s safe browsing diagnostic page can tell you if your website contains malicious software. The tool will even detect which form of malicious software or virus your site might be carrying. To use Google’s safe browsing diagnostic page, you’ll need to enter this long, ugly URL in your browser window and replace “YourSiteName.com” with your own domain: http://www.google.com/safebrowsing/diagnostic?site=YourSiteName.com
  • Check your Google Webmasters account to see if there are any malware warning messages in there. If you’ve got the maroon screen described above, there will almost always be a message in your Webmasters admin area.
  • Try the Sicuri SiteCheck scanner, it’s free and will identify major malware infections.

Procedure for Removing Hack

Find the Extent of the Incursion

Before you start repairing anything, do some sleuthing to find the hacker’s footprints. Login to FTP and search for any files which were altered recently. Filezilla has a feature which allows you to search the entire site by last modification with a touch of a button. Frequently you can narrow down to the hour when your site was compromised.

Things you will be looking for through FTP:

  • Index.php files which were recently modified. An index file in your web root will effectively hijack an entire WordPress installation
  • Any new PHP file
  • Recently modified files in your WP-themes folder. Sometimes hackers will insert hardcoded links into Header.php files and other template files
  • Uploaded media files, particularly of strange file types. Some WordPress features may allow a hacker to upload a script to your server that executes read and write commands
  • PHP files with obscured code. WordPress is an open-source software project. It will never have obscured code, or even poorly commented code.
    obscured-code
  • Large, mysterious, suspiciously named files of any type. WordPress rarely uses file names with random-seeming names.
    hackedFTPscreenshot

Examine any logs you may have available through either your cpanel or your FTP. Access logs and error logs will give you clues as to what’s going on.

Check your database for unusual activity. Log in to phpMyAdmin and search for telltale keywords like “Viagra” or “Cialis.”
phpsearch

Check your database for users with seemingly random email addresses or usernames. Hackers will happily insert their own contact information into your site so they can use the recover password function to regain access to your site.
hacked-user-phpmyadmin-screenshot

See What Google Has Found

Do a site search of your WordPress installation by typing “site:EXAMPLEDOMAIN.COM” in the Google search bar. This will give you a list of all the pages Google currently has in the index. Look for pages which the hackers generated out of whole cloth. These can persist in the index long after you’ve actually cleaned up the hack, and will have to be removed using Google Webmaster Tool’s remove URL function.

Don’t Forget to Check Your Own Computer!

Sometimes the source of a security breach is as close as your own fingertips. Whether you’re accessing your WordPress site from the home or office, there are many ways for a hacker to steal your passwords. Have you recently accessed your site through a wifi network, or from your smartphone? Never save your passwords on your FTP client. It is a simple matter for malware to read those passwords off your hard drive. The passwords for Filezilla aren’t even encrypted. Consider how easy it would be for a virus or other malicious software to grab your passwords, through keystroke capture or any other method. It’s vitally important to maintain a secure connection to your site. This would be a good time to run a Microsoft Security Essentials full scan on your computer.

Check the Other Sites on Your Server

It might be that the hack didn’t originate on your own site. Sometimes your hosting may be compromised at the server level, through no fault of your own. To test this out, visit some of the other WordPress sites on your shared hosting server to see if they have the same problem you do. You may not have ever checked out your server neighbors before, but luckily there’s a tool to help you out: the MajesticSEO Neighborhood Checker.

Change ALL the Passwords

There are at least four different passwords which unlock a WordPress site. If one of them has been compromised, the others have been peeled open too. If the hacker has your FTP password they can use that to read the database password which is displayed openly in your WP-config file, and with that they can edit the WP users. If your FTP password is the same as your cpanel login, which is default on many hosting services, then you will also need to worry about email addresses and passwords, database users, and possibly even your domains. Whatever passwords you have, change them, and change them quickly.

Screen Your WordPress Users

It will do you no good to change the passwords if the hackers can recover the passwords of an admin-level user. Make sure that all of the emails associated with your users correspond to an appropriate email address, and not an email controlled by the hacker. If you have a number of admin users and one of them has a compromised email, then you’re in trouble.
hackeduser

Rollback to Backups or Remove the Hacker Code Manually

At this point you should have a good idea of the extent and the source of the hack. If the root directory index.php has been overwritten then you can replace that file with one from a fresh WP installation. If theme files have been overwritten, then hopefully you have a backup. Frequently you can just remove any hardcoded script by hand and be more or less back to normal. Otherwise, if you have a backup of your database and WP-content folder which you know is clean, you can backtrack to those (making sure the old user passwords are secure).

Upgrade Everything

It’s easy to fall behind on updates. Sometimes we’re reluctant to install updates because nothing breaks a site quite as fast as a beta version from a volunteer open source project like WordPress. But sometimes those updates to the WordPress installation or the plugins contain important security patches. It’s not a panacea, but now that you’ve been hacked you want to leave no stone unturned.

Re-install WordPress. This will overwrite most of the critical files in the wp-admin and wp-includes folders and reduce the chance of hidden trojan code hanging around.

Steps You Can Take to Prevent Hacking in the Future

Now that you’ve cleaned up your site, you’re going to want to block attempts at re-infection.

  • Never save SQL backups on any public server.
  • Save frequent SQL backups to your home computer. Having a backup can speed up the cleaning process.
  • Keep your TimThumb.php file up-to-date. This helpful but vulnerable WordPress add-on has been particularly troublesome for WordPress owners over the years.
    Maintain security consciousness with any computer you use to access your site.
  • Add a security plugin like Wordfence. This will prevent brute force attacks from known hacker IPs and plug other security holes you might not have thought about.

Know When You’re Over Your Head!

This article won’t give you a solution to every single hacking problem. We’ll update as we learn more, but hackers are always on the bleeding edge and coming up with new ways to mess things up. If you’re getting repeatedly infected, or if you can’t restore the site to its original state, then it’s time to employ a reputable WordPress expert to lend a hand.

Send Us Your Hacking Stories!

Leave us a comment if you’ve got a hacking story to share. We want to know how they got in and how you fixed it. Show the code if you’ve got it!

How To Delete All WordPress Pending Posts

Have you run a multi-user blog that gone out of control? I had an open blog that over the years accumulated thousands of, ahem, “poor quality” articles in “pending” status. Rather than delete them in batches in the admin, I figured an SQL command that can remove all of them in a few seconds. But before I give you that…

Back Up Your WordPress Database

This is something you should do anyway. You backup your database by logging into your website control panel (hopefully you use cpanel) and clicking the icon for phpMyAdmin. Select “Export” on the top navigation and select SQL format and download the file to your local machine. That file is your database backup.

SQL Command to Delete WordPress Pending Posts

Again, in phpMyAdmin, click “SQL” on the top navigation, and enter the following command and click “Go”. This will also delete pending pages!

DELETE FROM wp_posts WHERE post_status = "pending";

Delete WP Pending Posts

That’s it. Your pending posts and pages will all be deleted.

Setting Up a Stripe.com Single Payment Page for WordPress

Stripe.com handles credit card payments at 2.9% (the same as PayPal) and let’s you integrate a single payment page or popup page within your WordPress site. Stripe is setup not as a total ecommerce solution, but rather is a better fit for single payments or donations. It has the advantage over PayPal in that customers aren’t required to sign up for an acount and aren’t taken to a separate gateway to make a payment.

Another option for payment solutions for those willing to attempt to gsayPal and Stripe in terms of price, as it’s only 25 cents per transaction. Dwolla offers the simple integration of a button and a WordPress plugin as well, but it does require that customers go through a signup process.

Stripe works well and is very easy to integrate with the WP-Stripe plugin which allows for installation vis shortcode or template insert.

Stripe.com Installation for WordPress

Here we’ll cover the installation of the plugin and how to set up Stripe.com for WordPress.

Lets start within WordPress. Login to your site and navigate to Plugins. Click Add New and Search for “WP Stripe.”

Click Install > Okay > Activate Plugin

Install-WP-Stripe

Then under the Settings tab of your WordPress admin, select WP Stripe.

Then select the WP Stripe Settings Tab.

WP-Stripe-Settings

In order to start taking payments and test payments, you need to go register an account at Stripe.com.

Register-Stripe.com

Once you’ve registered and logged in. You’ll be able to grab your API keys at this link: Stripe API Keys.

Take those API Keys (both the live and test keys) and copy/paste them into your WP Stripe settings area within your WordPress Dashboard. Then click Save Changes.

stripe-API-keys

Then you want to create a new page and enter the WP Stripe short code [wp-stripe]

Publish the page and it will look something like this:

stripe-button

One neat thing about Stripe is that it includes a popup form so that you really don’t have to modify any CSS if you’d rather not. Unlike a heavy eCommerce cart, Stripe is a fairly lightweight solution, so other than the plugin, with this particular type of integration, all the heavy lifting is done through Stripe.com which also means better security.

To test Stripe, (highly recommended) before sending clients to the newly created payments page, use the following dummy info.

Card Number 4242424242424242
Card Month 05
Card Year 2015
CVC Number 123

After you run the test, you should see the amount of test money you sent show up both in your WP Stripe area of the WordPress admin and in the Stripe dashboard as well.

Pro tip: If you want to eliminate the optional check box that asks to display recent donations or payments in the payment popup window, simply uncheck “Enable Recent Widget?” in the WP Stripe admin area.

That covers basic setup of WP-Stripe for a WordPress website. For more advanced tutorials and documentation Stripe has a well organized Developers portal. You can find an archive of our WordPress tutorials here.

Author: Ryan Howard is a TastyPlacement alumnus who now runs a digital refinery offering WordPress designs, local search marketing, ecommerce SEO services, and social media strategy.

WordPress Tutorial: Display All Posts on a Page

How to Create an Interior /blog/ Page That Mimics a Traditional WordPress Front Page

We got hung up recently trying to create an interior blog page (i.e., www.agreatsite.com/blog)  for a client’s design. This problem is more common now with full-featured templates and frameworks that employ sliders and carousels on the front page that are triggered by a template’s index.php file.

First, Create a Custom WordPress Page Template

First, you’ll need to create a custom WordPress page template. All WordPress templates have a page.php file as part of the default template–we simply want to vary that file a little bit. Make a copy of your page.php file and name it page-blog.php.

Next, you need to enter a few lines of code at the very top of your new php file:

<?php
/*
Template Name: Blog
*/
?>

The code above is a naming tag–the template name, in this case “Blog” will be the name that appears in the template selection box at the WordPress page edit window, which we’ll screenshot below.

The Code

Now, you can’t simply run the regular WordPress loop on our custom interior page, we are going to use the WordPress template tag get_posts to query our WordPress database and grab our posts. The following code accomplishes this:

$myposts = get_posts('');
foreach($myposts as $post) :
setup_postdata($post);
?>
  <div class="post-item">
    <div class="post-info">
      <h2 class="post-title">
      <a href="<?php the_permalink() ?>" title="<?php the_title_attribute(); ?>">
      <?php the_title(); ?>
      </a>
      </h2>
      <p class="post-meta">Posted by <?php the_author(); ?></p>
    </div>
    <div class="post-content">
    <?php the_content(); ?>
    </div>
  </div>
<?php comments_template(); ?>
<?php endforeach; wp_reset_postdata(); ?>

For the purposes of illustration, a greatly simplified version of the preceding code, without any html markup, hrefs, author information, post date data, or comment section would be as follows:

$myposts = get_posts('');
foreach($myposts as $post) :
setup_postdata($post);
?>
 <?php the_title(); ?>
 <?php the_content(); ?>
<?php endforeach; wp_reset_postdata(); ?>

How it Works

So what’s happening here? Well, the heart of the whole process is get_posts–this template tag queries the WP database and gets our posts.

Next, the foreach construct processes each post in turn–thus we’ll have all our posts on our blog page.  The setup_postdata WordPress function, well, sets up our data so it’ll display properly (otherwise the_content may not display the text of our posts. Finally, the wp_reset_postdata restores the $post global variable.

Once you’ve created the file, you’ll obviously want to upload it to your template (theme) directory.

Setting Your Blog Page

Your next step is to simply set up your blog page within the WordPress dashboard. From the WP dashboard, go to Pages, then Add New and create a page with a title “Blog” (or whatever is suitable). Remember the custom template we created above under the heading First, Create a Custom WordPress Page Template? You should now see your custom template name appear under the “Template” pull-down in the Page Edit screen, as indicated in the pic below by the green arrow.

Set the blog page by selecting the “blog” template

You don’t need to put any text in the text edit window, you just need a title–you won’t be displaying any page text here, you’ll be bypassing the specific text of this post and grabbing posts from the database.

Some Background on Why This Was Needed

Incidentally, framework and template designers that hijack WordPress’ index.php file to display a homepage slider, while requiring WordPress’ reading settings to be set to “Your latest posts” as shown in the screenshot below are doing a disservice to users (hence mandating this tutorial). The sounder practice is to code sliders and homepage features into a custom WordPress template.

Video Tutorial: All in One SEO Pack to Yoast WordPress SEO Plugin Migration

We’ve seen the light and are converting to the Yoast WordPress SEO plugin on all of our sites. However, when migrating from your existing SEO plugin to the (superior) Yoast plugin, there are a few tricks along the way that will help your conversion go seamlessly and keep your pages displaying properly. This tutorial walks you through the migration from the All in One SEO Pack to the Yoast SEO plugin for WordPress. Watch and learn – you (and your website) will be glad you did.

Video Tutorial: How to Clean Up Your WordPress Head

By default, WordPress prints a lot of extra code to the “head” section of webpages that it generates. For example, it prints a “generator” meta tag that identifies the site as a WordPress site–that can serve as a flag to hackers that specifically target WordPress sites. In this video tutorial we’ll learn a quick and easy way to clean the following items from your WordPress installation:

Here’s code to install in your functions.php to follow the above tutorial:

remove_action('wp_head', 'rsd_link');
remove_action('wp_head', 'wp_generator');
remove_action('wp_head', 'feed_links', 2);
remove_action('wp_head', 'index_rel_link');
remove_action('wp_head', 'wlwmanifest_link');
remove_action('wp_head', 'feed_links_extra', 3);
remove_action('wp_head', 'start_post_rel_link', 10, 0);
remove_action('wp_head', 'parent_post_rel_link', 10, 0);
remove_action('wp_head', 'adjacent_posts_rel_link_wp_head', 10, 0 );

How to Add a Sidebar to Your WordPress Theme

Most simple WordPress templates/themes generally employ a single sidebar. But, in keeping with WordPress’ open architecture, you can easily add a second (or 3rd or 4th) sidebar to your site’s theme. And, you aren’t restricted to using your sidebar in the typical sidebar area–you can put your new sidebar in a header, a footer, or any other area in your template. Additional sidebars let you place any WordPress Widget (such as Recent Posts, Pages, Links/Blogroll, Calendar, Tag Cloud, as well as any custom widgets) into new areas of your WordPress template. This technique is especially powerful when combined with custom WordPress page templates–with additional sidebars, we can have custom sidebars for each of our custom page templates. This is the approach we’ll teach you in this tutorial.

Laying the Groundwork for Your New Sidebar

So what we’ll do in this tutorial is to add a second sidebar to one of our custom template pages in our WordPress theme. We have a custom homepage in our template where we want to include a robust call to action to our website visitors rather than a Category list which is more appropriate for blog readers. The screenshot below shows the default “Sidebar 1” sidebar from our simple template, and we’ll add a second sidebar called “Homepage Sidebar”.

Add WordPress Sidebars

Let’s first take a 10,000 foot view, we are going to employ the following steps to add our sidebar:

  • We are going to register our sidebar within the template by making an entry in the template’s functions.php file.
  • We are going to create a separate, custom sidebar file called sidebar-homepage.php.
  • We are going to include a reference to our custom sidebar-homepage.php file in our custom page template.

That’s it! With these three steps, we’ll have a 2nd sidebar that will display on our custom homepage. With the same technique, we could create additional sidebar areas, the steps would be the same.

Step 1: Registering the Additional Sidebar Within the WordPress Template

First step: we start by registering our sidebar within the template’s functions.php file. 99% of all WordPress templates/themes have a functions.php file. If your theme doesn’t have one, simply create a file in a text editor (we like Notepad++ in the Windows environment and TextMate in the Apple environment). If you don’t know how to find your theme files, you’ll find them in your web host in the following directory: www.yoursite.com/wp-content/themes/yourtheme/.

You’ll want to begin by finding any existing “register_sidebar” entries in your functions.php file. Ours had the following existing sidebar definition for our single default sidebar:

if ( function_exists('register_sidebar') ) {
register_sidebar(array(
'before_widget' => '<li id="%1$s" class="widget %2$s">',
'after_widget' => '</li>',
'before_title' => '<h2 class="widgettitle">',
'after_title' => '</h2>',
));
}

To register our second sidebar, we simply add the following code to the functions.php file:

if ( function_exists('register_sidebar') ) {
register_sidebar(array(
'name' => 'Homepage Sidebar',
'id' => 'homepage-sidebar',
'description' => 'Appears as the sidebar on the custom homepage',
'before_widget' => '<div style="height: 280px"></div><li id="%1$s" class="widget %2$s">',
'after_widget' => '</li>',
'before_title' => '<h2 class="widgettitle">',
'after_title' => '</h2>',
));
}

So what did we just do?

  • We told our WordPress installation, “we are adding a second sidebar area that we’ll use in our theme”
  • The sidebar’s name is “Homepage Sidebar”
  • The ID of the sidebar (we’ll refer to that ID later) is “homepage-sidebar”; you can choose “footer-sidebar”, “second-sidebar” or anything you want
  • We added the description “Appears as the sidebar on the custom homepage” that will display just under the sidebar’s title.

If you upload your new functions.php file to your WordPress installation, you should see your new sidebar if you browse from your WordPress dashboard to Appearance, then Widgets. It should look like the following picture. We’ve already added a Text Widget with the title “Contact Us” to ours, but yours will be empty when you first look at it. But, all we have done is create the sidebar so far; we haven’t yet taken the steps to display the sidebar anywhere in our theme, that will come in the next steps.

Add WordPress Sidebar Step 2

If you see your new sidebar in the Widgets area of your WordPress Dashboard, you are ready to move on to the next step.

Step 2: Create an Additional Sidebar File

WordPress themes use a default file called sidebar.php to display sidebars on pages and posts. But, our goal is to create a second sidebar, we’ll do that with a separate file called sidebar-homepage.php.

Again, we’ll open our text editor and create a file and paste in the following code and insert the ID of your new sidebar within the “dynamic_sidebar()” declaration like so:

<div id="sidebar">
   <ul>
      <?php
      if ( !function_exists('dynamic_sidebar') || !dynamic_sidebar('homepage-sidebar') ) :
      endif; ?>
   </ul>
</div>

Now, we have to note that our example sidebar file is highly simplified. Most sidebar files have more code–this extra code displays core navigation in the event the sidebar does not have any widgets installed in it–but for the purposes of this tutorial, we have to simplify it. As an alternative, you can simply copy your sidebar.php file and rename it. Don’t forget to include your sidebar ID within the dynamic_sidebar declaration (shown in red in the code example above)–that sidebar ID tells WordPress which sidebar (which we registered in Step 1) to display.

Step 3: Call the Additional Sidebar from Your Theme Files

We’re almost there. Now, all we need to do is call our new sidebar file, sidebar-homepage.php from our template files–keep in mind that our file name must follow this construct: sidebar-_______.php; we’ll see why in a moment. In our example, we’ll call our sidebar file from a custom template page–but you can call your new sidebar from a footer file, header file, or any theme file that displays on your WordPress site.

The function in WordPress that calls sidebars is get_sidebar(). When get_sidebar() is used with no information within the parenthesis, WordPress grabs the default sidebar.php file. But we want to grab our sidebar-homepage.php file, so we put “homepage” in single quotes within the get_sidebar parentheses. This tells WordPress to grab a file called sidebar-homepage.php . The code we want to insert in our template file is the following:

<?php get_sidebar('homepage'); ?>

What we’ve told WordPress to do is the following: we want to grab a sidebar file, but not the default sidebar, we want a file called sidebar-homepage.php. With this string of code, we’ve successfully grabbed our custom sidebar file.

Our New Sidebar

If you’ve coded your additional sidebar correctly, you can drag Widgets from the WordPress dashboard to your new sidebar and you’ll see the widgets displayed on your WordPress site. Here’s our new sidebar displaying on our homepage, while we display our default sidebar on interior pages and blog posts:

Our New WordPress Sidebar

Other Approaches to Adding Sidebars

Our method is one of many, there are more elegant ways of accomplishing the same result without creating separate template files, but the method outlined here is simple and reliable. Please comment below if you have questions or run into trouble.

Your WordPress site needs SEO. Buy our WordPress SEO book at Amazon. Now in the second edition!


Are Site-wide H1 Tags in WordPress Good or Bad?

Questions from Readers

The great thing about writing our book, WordPress 3.0 Search Engine Optimization, is we get to hear from all those readers who have taken our material and put it to work in the field. Today, we’ve got a fascinating question from Robert, who asks that question we confront every day in one way or another: Just how far should I trust Google’s sophistication?

Hi Michael,

I’m currently reading your Packt book on WordPress SEO, and I have a quick question about HTML5 and the way it uses header tags. Your book says to use only one H1 tag per page, which makes sense. However, HTML5 advocates multiple H1 tags per page, as long as each is contained in a separate section/header.

Worse yet, the first H1 tag on a page is usually a wrapper around the home link logo and contains the same meaningless title text on every page. You can see a typical example at CSS3maker.com :

<header>

<h1 id=”logo”><a href=”index.html” title=”CSS 3.0 Maker”>Css 3.0 Maker</a></h1>

</header>

Most SEO bloggers assume single H1 tags are a thing of the past. Based on your experience, has there been any evidence that Google/Yahoo interpret HTML5 content any differently than HTML/XHTML?

If not, should I remove the header and h1 tags around my logo anchor tag? My site looks like the CSS3maker code above. And like them, I don’t have anything else in my header, so if I remove the H1 tag, wouldn’t I also just scrap the header tag? I have a meaningful H2 tag in my content section, which could be elevated to an H1 tag.

Thanks,
Robert

BTW, I’m really enjoying your book.


Robert,

This may be a cop out…but does this help?

I think google is tuned in enough to ignore site-wide h1 tags. One of my philosophies is “packaging”–make it so brain-dead easy for a search engine that it can’t POSSIBLY get confused. We are sort of on-page nerds when it comes to that stuff. Most of the pages we create are pretty perfect, at least on the page.

Do we, in our SEO business, remove site-wide h1 tags around logos and site names in the header? Absolutely we do, but I don’t think it’s the kiss of death if you don’t. Remember one thing: google has to fit its algorithm so that it doesn’t punish sites for small mistakes–otherwise, it would punish 80% of the web or more.

I am very glad you are enjoying the book!

Michael

Buy the Book Today at Amazon

Tutorial: How to Remove link rel=’prev’ and link rel=’next’ from WordPress Head

How to Remove link rel=’prev’ and link rel=’next’ from WordPress Head (in WP 3.0+)

WordPress, in its default state, prints a lot of excess code to the head section of webpages. One element that always annoyed me were two entries that always appeared:

<link rel='prev' title='' href='' />
<link rel='next' title='' href='' />

These entries are recommended for web usability for disabled persons–consider that before removing them. We were looking for a way to lean up our pages, though, so we thought we’d like to remove these entries. There are some outdated instructions in WP forums that will not work in WP 3.0; we tried several approaches, but nothing worked.

In your WordPress template, you’ll find your functions.php file. Open that file and enter the following line.

remove_action( 'wp_head', 'adjacent_posts_rel_link_wp_head', 10, 0 );

This “filter,” as it is called, will tell WordPress not to generate the link rel=’prev’ and link rel=’next’ lines in the WordPress head.

Just a note on why those outdated instructions wouldn’t work with WP 3.0. The filter we created instructs WP to turn off the action titled “adjacent_posts_rel_link_wp_head.” Our commands works in WP 3.0 and above because the former action prior to 3.0 was titled “adjacent_posts_rel_link.”


WordPress Stripping iFrame Elements? Here’s the Fix.

Elements like Google Map embeds get stripped out. Here’s the Fix.

If you have ever tried to enter a Google Map embed into a WordPress page or post, you’ve noticed that switching between “Visual” and “HTML” view in the page or post edit window strips the iFrame out–leaving you with broken code that displays nothing. Luckily, there is a fix.

You’ll need to find the functions.php file in your active theme folder. It’s a standard WordPress file, so it’ll be there. Next, we are going to add two short functions that change the way the WordPress editor handles iFrame code. You’ll want to insert the following lines of code before the closing “?>”  of your functions.php file.

// this function initializes the iframe elements 

function add_iframe($initArray) {
$initArray['extended_valid_elements'] = "iframe[id|class|title|style|align|frameborder|height|longdesc|marginheight|marginwidth|name|scrolling|src|width]";
return $initArray;
}

// this function alters the way the WordPress editor filters your code
add_filter('tiny_mce_before_init', 'add_iframe');

That’s it. You can test your mod by entering some iFrame code in the editor window and switching between  the visual and HTML editor.